

Passkeys
Passkeys are a phishing-resistant alternative to passwords. Instead of typing a password, users authenticate with whatever their device already uses - Face ID, Touch ID, Windows Hello, or a hardware security key like a YubiKey. There’s no password to steal, no password to forget, and no phishing page that can intercept credentials.
Petal Pro ships with passkey support out of the box. It’s disabled by default so you opt in when you’re ready.
Enabling passkeys
Flip the feature flag in your config:
config :petal_pro, :passkeys_enabled, trueThat’s it. The sign-in page will now show a “Sign in with passkey” button, and the security settings page will show a passkey management section where users can register their devices.
To check the flag at runtime:
PetalPro.passkeys_enabled?()Custom domain config
By default, passkeys are scoped to the host of your endpoint URL. This is the rp_id (relying party ID) in WebAuthn terms - it determines which domains a passkey is valid for.
Most of the time you don’t need to touch this. If you’re running on a subdomain and want passkeys to work across the whole domain (e.g., register on app.example.com and sign in on example.com), set these explicitly:
config :petal_pro,
  passkeys_rp_id: "example.com",
  passkeys_origin: "https://app.example.com"
passkeys_rp_id is the domain passkeys are scoped to. passkeys_origin is the full origin your app is served from. In production, set these via environment variables if your domain isn’t hardcoded.
⚠️ Warning: A passkey registered on one origin won't work on another. If you change passkeys_rp_id in production, existing passkeys will stop working. Get this right before users start registering.
How it works for users
Registering a passkey
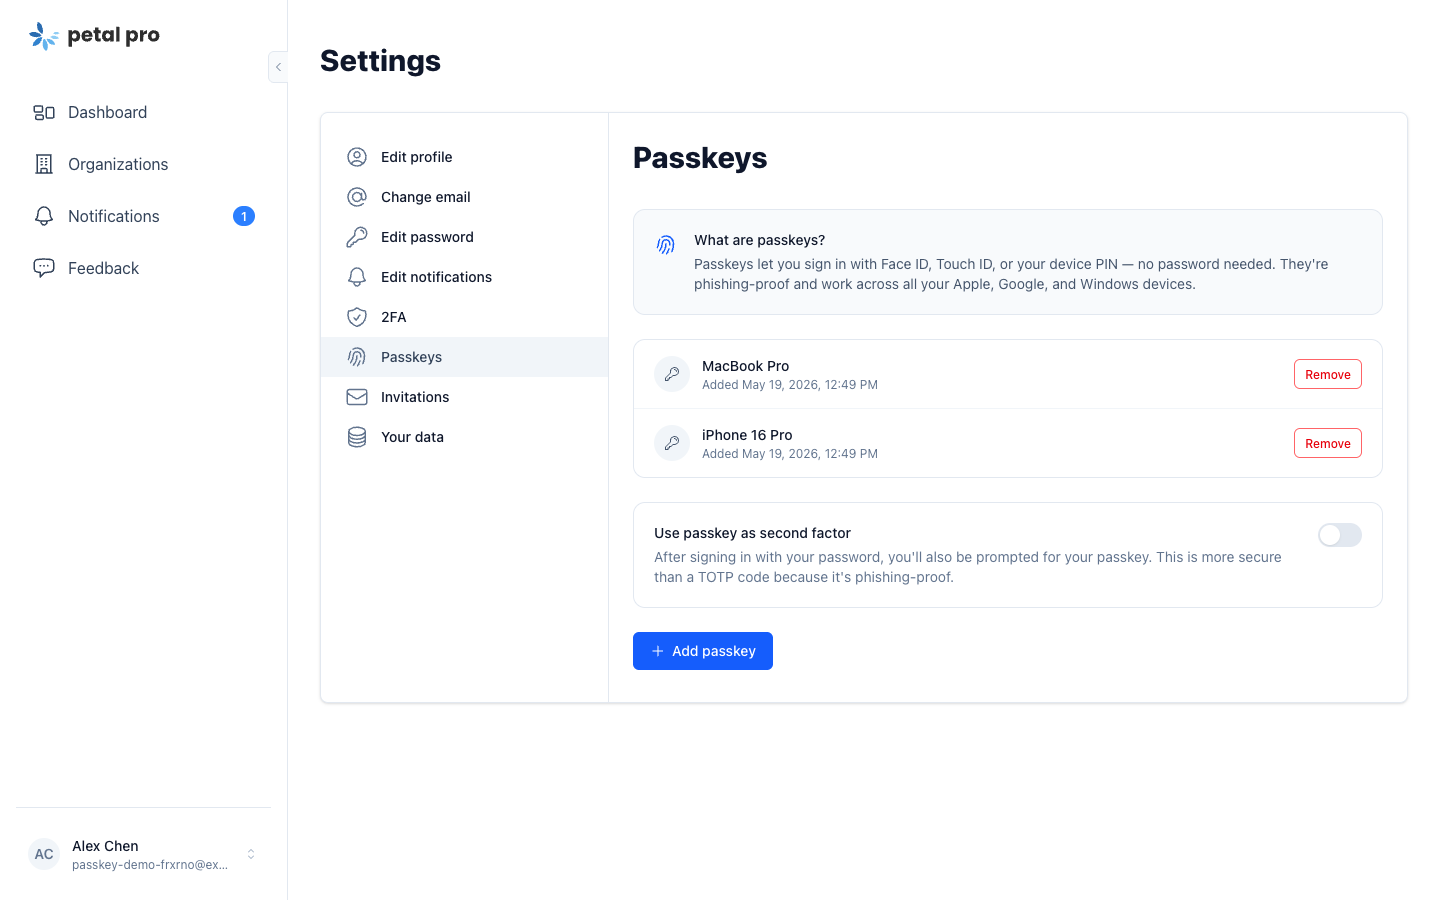
Users manage their passkeys from the security settings page at /app/users/security. They can:
- Register up to 5 passkeys
- Give each passkey a name (e.g. “MacBook Touch ID”, “iPhone Face ID”)
- Delete passkeys they no longer need
When registering, the browser prompts for the local authenticator - Face ID, fingerprint, PIN, or a hardware key. The private key never leaves the device. Petal Pro stores a public key credential in the user_passkeys table.
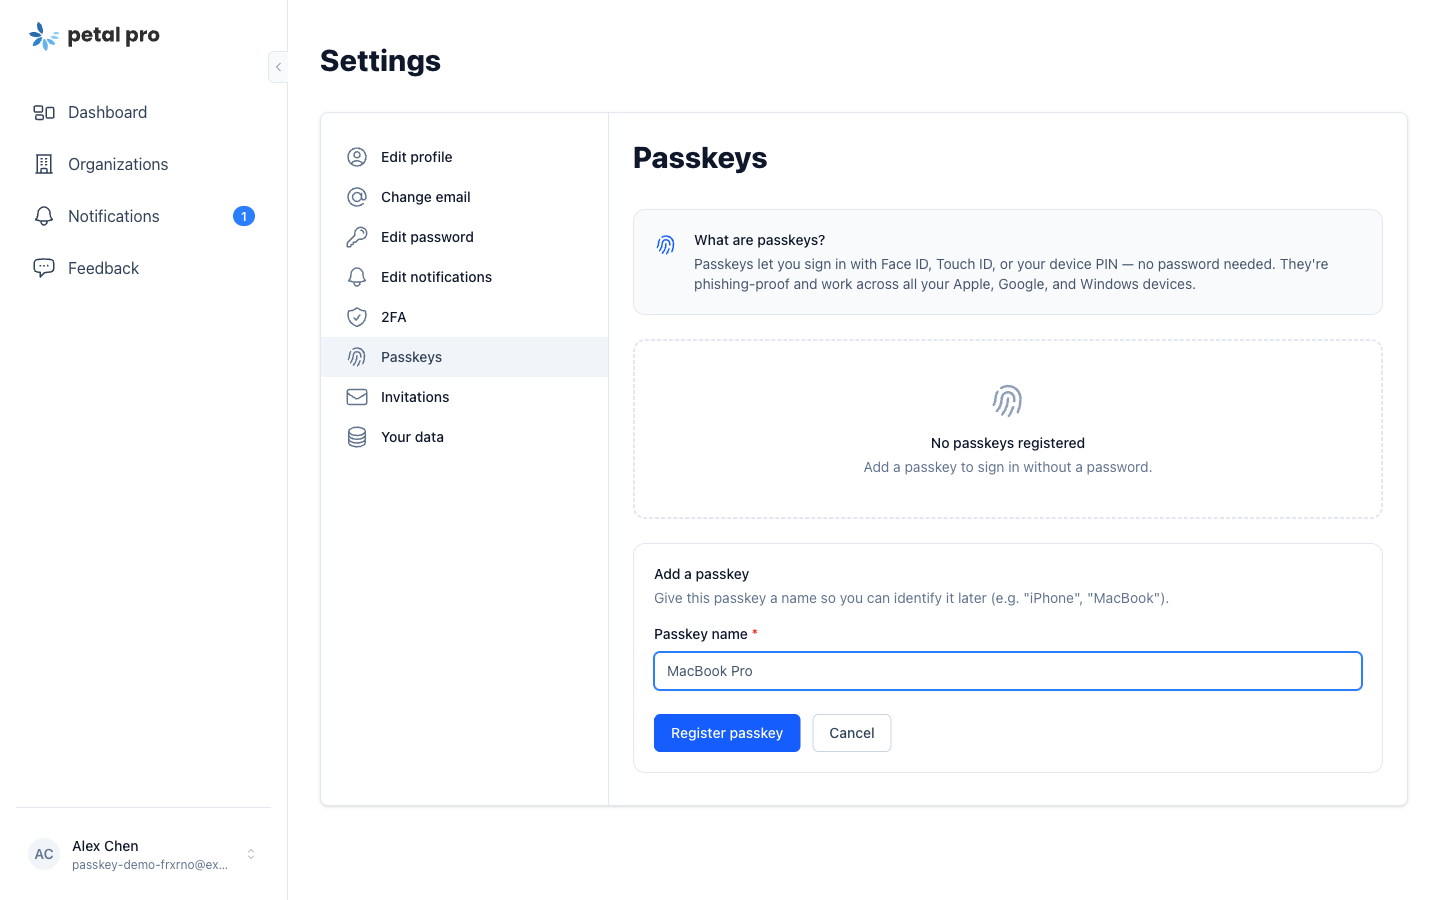
Once registered, the security settings page shows all your passkeys with the option to toggle 2FA mode or remove individual keys.
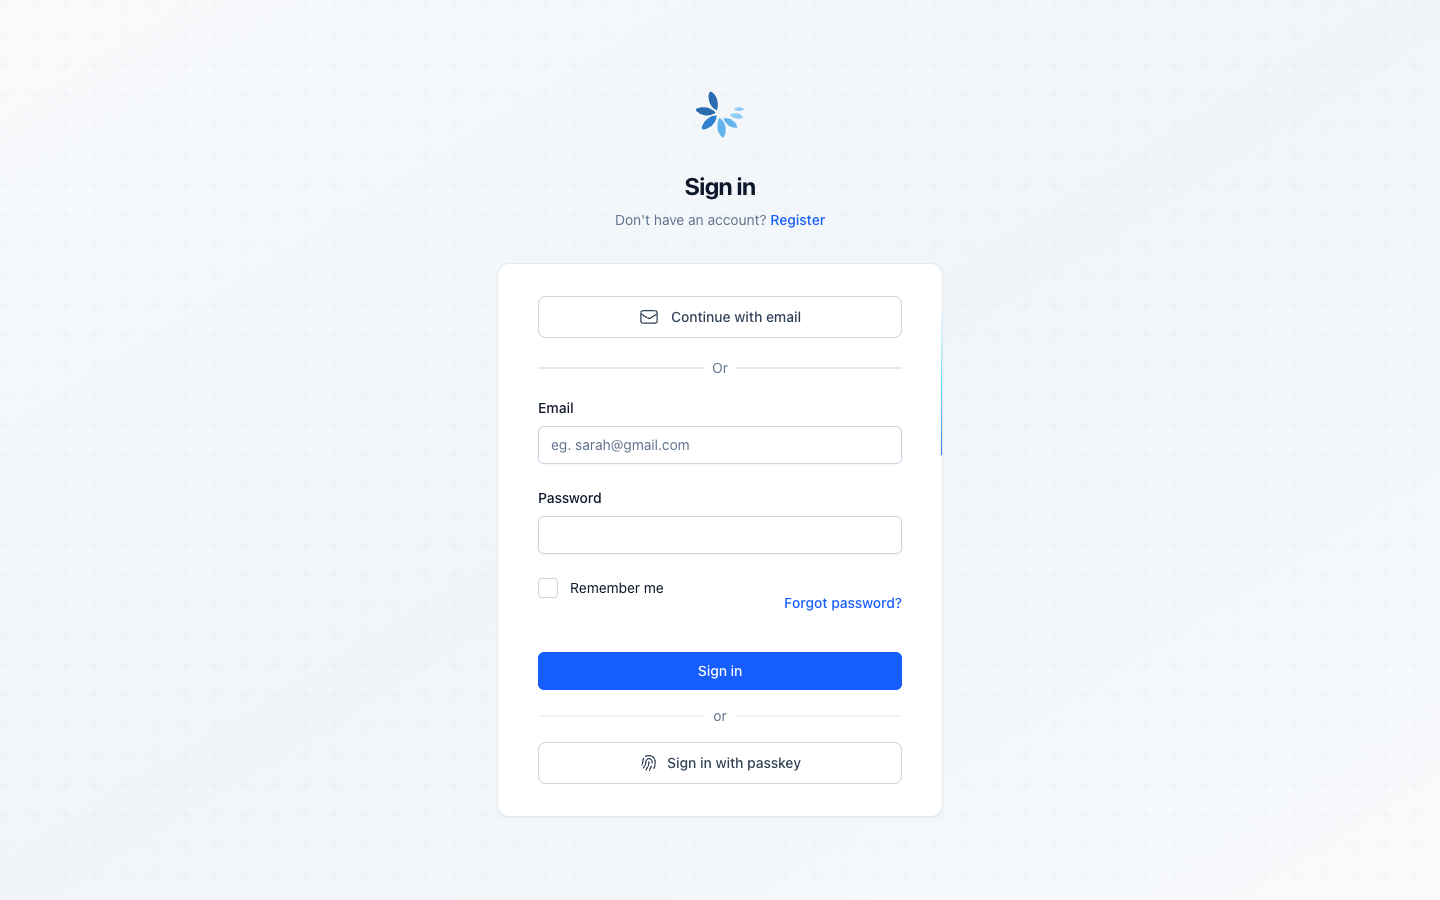
Signing in
When passkeys are enabled, the sign-in page shows a “Sign in with passkey” button. The user clicks it, the browser presents available passkeys for the site, and they authenticate with their device. No password needed.
The relevant routes:
GET  /users/passkey-verify   # shows the passkey challenge prompt
POST /users/passkey-verify   # completes the authentication
Primary auth vs 2FA mode
Passkeys work in two modes in Petal Pro:
Primary auth (passwordless) - The user clicks “Sign in with passkey” on the login page. They never touch a password field. This works for any user who has registered at least one passkey.
Second factor (2FA) - After signing in with a password, users with passkey_2fa_preferred: true get redirected to /users/passkey-verify to confirm with their passkey instead of a TOTP code. This gives you the convenience of passkeys without fully replacing password login.
The passkey_2fa_preferred flag lives on the User schema. Users can toggle it from their security settings once they have a passkey registered. You can check it programmatically:
PetalPro.Accounts.passkey_2fa_preferred?(user)ℹ️ Note: Passkeys and TOTP are independent. A user can have both set up. If passkey_2fa_preferred is true, the passkey prompt takes precedence over the TOTP prompt after password sign-in.
Removing passkeys entirely
If you don’t want passkeys in your app at all, here’s what to clean up:
-
Config - Remove or leave
passkeys_enabled: falseinconfig/config.exs. This is enough to hide all the UI. -
Schema - If you want to remove the database fields too, drop
user_passkeystable and removepasskey_2fa_preferredfrom theuserstable. You’ll need to write a migration for that. -
Routes - Remove the passkey routes from
router.ex. Search for/users/passkey-verifyand theEditPasskeysLiveroute. -
UI - The “Sign in with passkey” button on the login page and the passkey section in security settings are both gated on
passkeys_enabled?(), so they disappear automatically when the flag is off. If you want to remove the dead code entirely, search forpasskeys_enabled?andEditPasskeysLiveacross the codebase. -
Dependencies - Passkeys are powered by the
waxHex package. If you’re stripping the feature entirely, remove it frommix.exs.
Most projects won’t need to do any of this - disabling the flag is enough to ship without passkeys, and you can always turn it back on later.